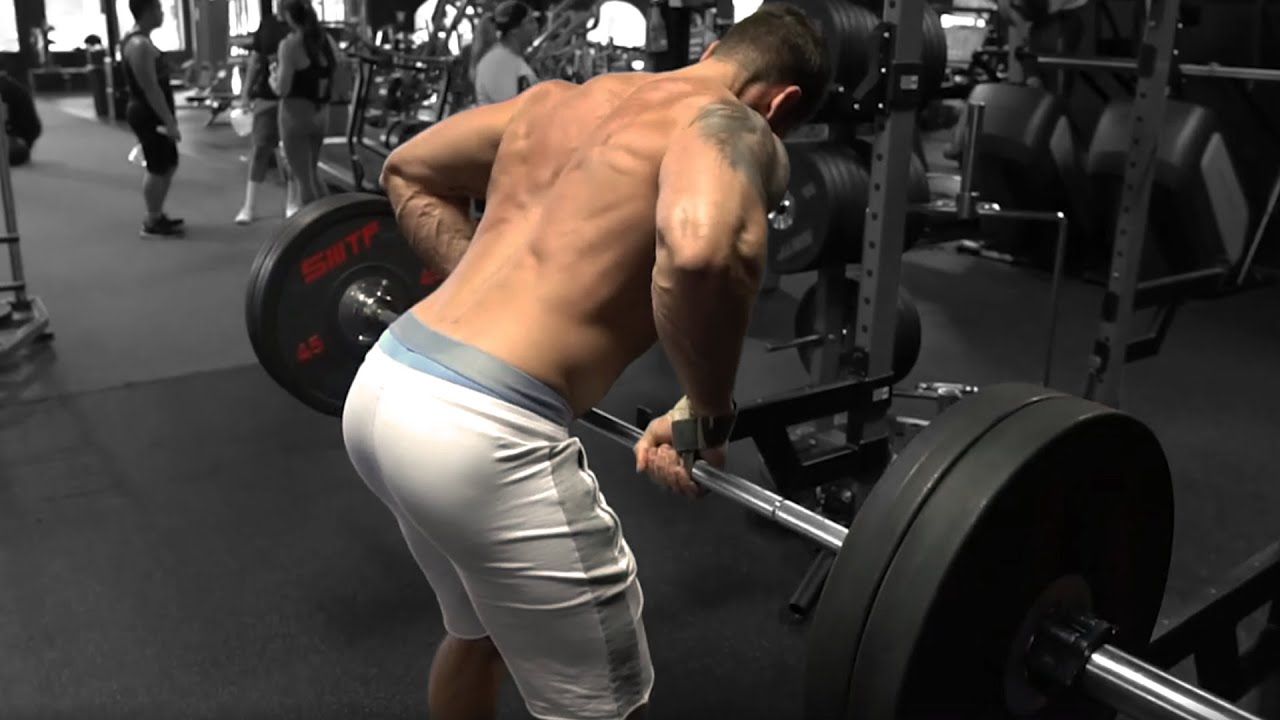
If you’ve spent any time in a weight room, you’ve seen lifters bent over, pulling a barbell toward their belly. That’s the bent-over row — a timeless back-builder that’s as essential as squats or bench press if you want a thick, strong upper body.
A lot of people think the bent-over row is just a simple pulling exercise. Pick it up, put it down, repeat. But done wrong, it can wreck your lower back or turn into a glorified bicep curl. Done right, though, it’ll build wide lats, dense traps, and a back that looks like armor plating.
So, let’s break down how to actually do the bent-over row properly, why it works so well, the biggest mistakes to avoid, and how to add it to your routine so you get the best gains without tweaking your back.
Why the Bent-Over Row Is a Must-Have
When you row heavy, you train multiple muscles at once:
- Lats (your wings)
- Rhomboids and traps (upper back thickness)
- Rear delts (shoulder balance)
- Spinal erectors (lower back support)
- Biceps and forearms (grip and pull)
It’s basically a full upper-body pull in one move. That’s why it’s a staple for powerlifters, bodybuilders, and anyone who wants real-world strength.
Rows don’t just make your back look good, either. They help your posture, counteract all the pushing you do (bench, overhead press), and strengthen your core because you’re bracing hard to keep your spine safe.
How to Set Up the Bent-Over Row
You don’t just grab a bar and yank. Good setup makes or breaks this lift.
Step 1: Pick Your Bar
Most people use a standard Olympic barbell. If you’re new, start lighter or even try dumbbells first to learn the movement.
Step 2: Find Your Stance
- Stand with your feet about hip-width apart.
- Grip the bar a little wider than shoulder-width.
- Your palms face you (overhand grip). You can also use an underhand grip — more on that in a bit.
Step 3: Hinge the Right Way
This is huge. Don’t just bend your back. Proper form starts with your hips.
- Soften your knees slightly — don’t lock them out.
- Push your hips back like you’re closing a car door with your butt.
- Keep your chest up and your back flat.
- Hinge until your torso is about 45 degrees to the floor. Some people go more parallel, but 45 is safer for most.
Your hamstrings and glutes should feel loaded up like springs. Your core should feel tight. No rounded back.
Step 4: Engage Your Core
Brace your abs like someone’s about to poke you. This keeps your spine protected.
Step 5: Pull With Control
- Start with the bar hanging at arm’s length below your chest.
- Pull the bar toward your belly button, not your chest.
- Lead with your elbows, squeeze your shoulder blades together at the top.
- Lower the bar back down under control. Don’t just drop it.
How Many Reps and Sets?
- For strength: 4–6 reps, heavier weight.
- For muscle: 8–12 reps, moderate weight.
- For endurance: 12–15 reps, lighter, strict form.
Rest 60–90 seconds between sets if your goal is muscle growth.
Bent-Over Row Variations
Don’t get bored — rows come in flavors.
1. Underhand Bent-Over Row (Reverse Grip)
Flip your grip so palms face up. This hits the lower lats a bit more and brings your biceps in more too.
Tip: Keep elbows close to your sides. This style feels natural for some lifters with shoulder issues.
2. Dumbbell Bent-Over Row
Perfect for beginners or fixing muscle imbalances. Each arm works alone, so your stronger side can’t cheat for your weaker side.
How to do it: Hinge like before, hold a dumbbell in each hand, pull elbows up, squeeze, control down.
3. Pendlay Row
Hardcore version. Instead of holding tension, you reset the bar on the floor each rep. Dead stop every time — less cheating, more power.
Tip: Your torso is more parallel to the ground than in a classic bent-over row.
4. T-Bar Row
Use a landmine bar or T-bar row machine. Puts you in a similar hinge, but with a neutral grip. Great for heavy loads.
Common Mistakes (And How to Avoid Them)
A bent-over row done sloppy is a back tweak waiting to happen. Here’s what to watch out for:
1. Rounding Your Lower Back
Your back should stay flat, chest proud, core tight. If you feel your back rounding, drop the weight and fix your hinge.
2. Using Momentum
If you’re swinging your upper body to yank the bar up, you’re not rowing — you’re doing a weird clean and jerk. Control the weight. Use your muscles, not momentum.
3. Not Pulling With Your Back
Lots of people make it all arms and biceps. Think elbows, not hands. Drive your elbows behind you and pinch your shoulder blades together.
4. Standing Too Upright
Standing too tall turns the row into more of an upright shrug. Hinge forward enough to really hit the lats.
5. Going Too Heavy
If you can’t row the bar without your form falling apart, lighten up. Perfect reps build muscle, sloppy reps build injuries.
How to Add Bent-Over Rows to Your Workout
If you’re doing a classic push-pull split, bent-over rows go in your pull day. For full-body plans, do them after deadlifts or squats. Here’s an example:
Sample Pull Day:
- Pull-Ups — 4 sets
- Barbell Bent-Over Row — 4 sets of 6–8 reps
- Single-Arm Dumbbell Row — 3 sets of 8–10 reps
- Face Pulls — 3 sets of 12–15 reps
- Bicep Curls — 3 sets of 10–12 reps
Or, add them to your back day with other rows and pull-downs. Once a week is solid for most lifters, twice if your back needs extra work.
Row Safely, Grow Strong
The bent-over row is a brute force move, but the magic’s in the details. When you hinge well, brace tight, and pull with your back — not your ego — you’ll see serious gains in your width and thickness.
Keep your rows clean, switch up grips and angles over time, and pair them with big lifts like deadlifts and pull-ups.
Row smart, row strong, and watch your back blow up in the best way possible. Now grab that bar and go build some pulling power!