Reverse planks don’t always get the love they deserve. Most people are more familiar with the regular forearm plank, but the reverse plank is like the underrated cousin that delivers serious benefits—especially for posture, back strength, and glute engagement.
At first glance, it might look like a simple “upside-down” plank, but the reverse plank is anything but basic. It challenges your entire backside—shoulders, glutes, hamstrings, and core—while stretching the front of your body. But here’s the deal: form matters a lot. A reverse plank done incorrectly can easily strain your neck, hurt your lower back, or completely miss your glutes.
So, if you’ve been doing reverse planks and not feeling the results (or worse, feeling pain), it’s time for a reset. Let’s break down the right way to do it and go over the three mistakes you absolutely need to avoid.
What Is a Reverse Plank?
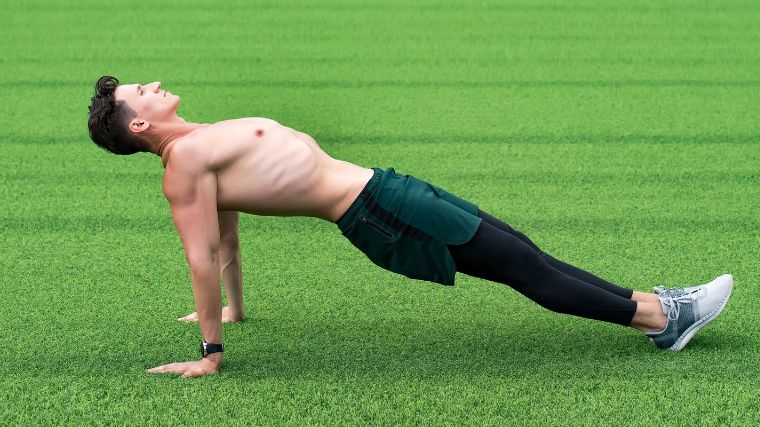
Before we dive into the don’ts, let’s go over what a proper reverse plank should look like.
How to do it:
- Sit on the floor with your legs extended straight in front of you.
- Place your hands behind your hips, fingers pointing toward your feet.
- Press through your palms and heels as you lift your hips off the floor.
- Engage your glutes, keep your legs straight, and lift your chest.
- Your body should form a straight line from head to toe.
Hold for 20–30 seconds to start, building up as you get stronger.
Sounds simple, right? But that’s where things get tricky—because it’s easy to look like you’re doing it right while your body cheats its way through the movement.
Mistake 1: Letting Your Hips Sag
This one’s the most common. You lift up, hold the position, and by the 10-second mark, your hips are already starting to droop.
Why it happens:
Weak glutes, lack of core engagement, or simply being unfamiliar with the move. Your body starts relying on your lower back or shoulders to hold you up instead of your hips and glutes.
Why it’s a problem:
Sagging hips means your core isn’t doing its job. It puts unnecessary pressure on your spine and completely takes the load off your glutes and hamstrings.
How to fix it:
- Before lifting, squeeze your glutes like you’re trying to pinch a coin between them.
- As you rise, think about pressing your hips up toward the ceiling.
- Imagine a straight line from your shoulders to your heels and work to maintain it.
Even if you can only hold that perfect line for 15 seconds, it’s better than sagging through 30.
Mistake 2: Dropping the Head or Straining the Neck
Ever seen someone in reverse plank with their head completely flopped back—or worse, jammed up toward their chest? Neither is good.
Why it happens:
People often forget about neck alignment or overcompensate by tightening up their neck muscles when their shoulders get tired.
Why it’s a problem:
This can lead to neck pain, headaches, and poor posture. Plus, once the neck is out of alignment, the rest of the spine usually follows.
How to fix it:
- Keep your gaze up at the ceiling, not behind you.
- Your head should be in line with your spine—neither dropped nor forced back.
- Think “long neck” and “lift through the chest” to keep the alignment clean and tension-free.
Your neck isn’t the star of the show here. Keep it neutral and let your bigger muscles do the work.
Mistake 3: Not Engaging the Core and Glutes
This one’s sneaky. You might look like you’re in the right position, but if you’re not actively squeezing your glutes and bracing your core, you’re missing the full benefits.
Why it happens:
Reverse plank looks passive. You’re just holding still, right? So it’s easy to forget that you’re supposed to be working hard in this position.
Why it’s a problem:
If you’re not contracting the right muscles, you’re just hanging in your joints. That’s not safe, and it’s definitely not effective.
How to fix it:
- Drive your heels into the floor and squeeze your butt from the moment you lift.
- Pull your shoulder blades down and engage your abs, like you’re zipping up a tight pair of jeans.
- Keep checking in with your body during the hold—are your glutes still firing? Is your core still tight?
When done properly, reverse plank should feel like your entire back body is working, not resting.
Bonus Tips to Get the Most from Reverse Planks
- Start small: Even 15 seconds is a win if your form is strong.
- Try bent-knee reverse planks if straight legs are too intense—same benefits, less strain.
- Pair with regular planks for front and back core strength.
- Don’t rush progress: Work on quality over quantity.
Final Thought
Reverse plank might not be flashy, but it’s one of the best low-impact moves for full-body tension, posture improvement, and glute activation. The key is to keep your form clean, your core strong, and avoid the three common mistakes: saggy hips, floppy head, and lazy glutes.
So the next time you add reverse planks to your workout, treat them like a full-body challenge—not a resting pose. Do it right, and your backside (and spine) will thank you.